
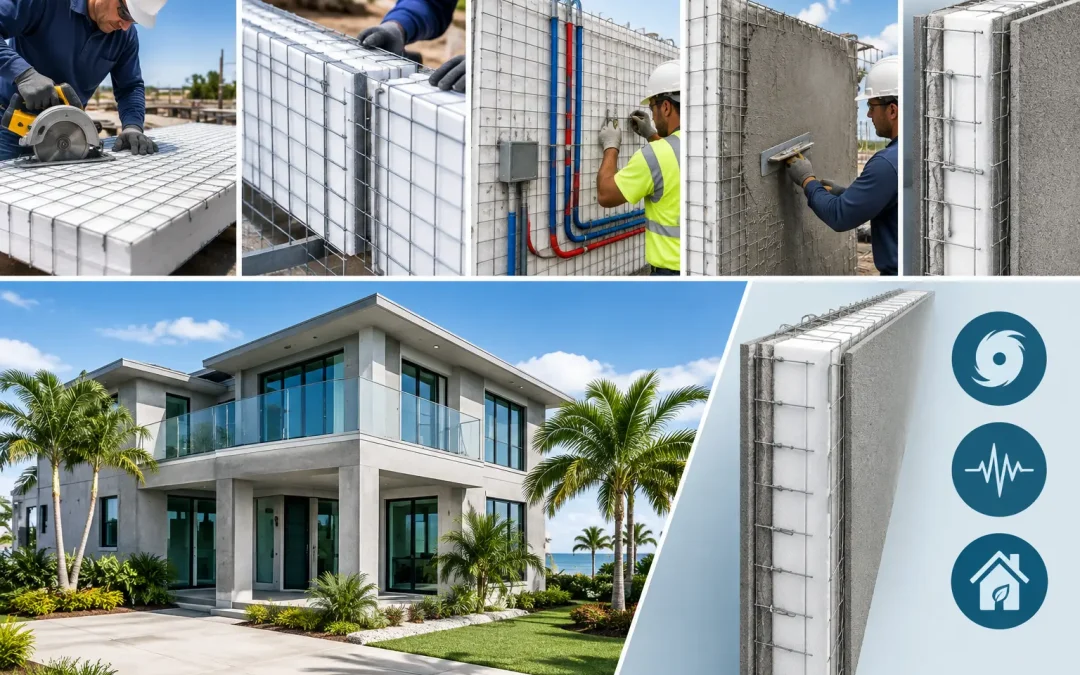
The panel is erected, aligned, braced, and tied into the structure. Now comes the work that turns a SCIP assembly into a finished, high-performance wall: applying the cementitious skins correctly. Knowing how to finish SCIP walls is not simply a question of appearance. The mortar application creates the structural faces of the system, protects the EPS insulation core, and establishes the durable surface that will receive the final architectural finish.
For contractors working in fire, hurricane, and seismic risk zones, that distinction matters. Recent disasters, including the Palisades fires in Los Angeles and destructive seismic events affecting Venezuela, have caused owners and design teams to reconsider conventional wood-frame construction. A properly specified SCIP wall system combines galvanized steel mesh, continuous insulation, and high-strength cementitious mortar into an assembly built for demanding conditions. The finish phase must protect that performance rather than compromise it.
Start With a Finish-Ready SCIP Installation
Do not begin mortar application until the panels, connections, and required reinforcements have been reviewed against the approved project documents. Panels must be plumb, securely braced, and properly joined. Loose mesh, unfastened panel ties, misaligned corners, and unaddressed penetrations become much harder to correct after the first mortar pass.
Confirm that electrical boxes, conduit, plumbing sleeves, embeds, and other rough-ins are in place. SCIP panels allow chases to be formed in the EPS core, but services must be coordinated before finishing. Cutting through a completed cementitious skin to add late-stage utilities adds labor, creates repair work, and can interrupt the continuity of the wall assembly.
Openings also deserve close attention. Door and window bucks, corner reinforcement, lintel conditions, and mesh returns should be installed as shown in the engineering details. At transitions to foundations, roof connections, dissimilar materials, and control joints, use the specified accessories and reinforcement. These are the locations where movement, moisture exposure, and stress concentration can show up first.
Clean and inspect the mesh
The galvanized wire mesh must be exposed, clean, and firmly connected so the mortar can fully encapsulate it. Remove construction debris, excess EPS fragments, oil, and loose wire. Inspect panel joints and verify that mesh laps, supplemental ties, and reinforcement are complete.
A finished wall is only as reliable as the substrate beneath it. If the mesh is floating, damaged, or improperly lapped, the mortar skin cannot develop the intended composite action. Correct those conditions before material is mixed.
Use the Right Mortar and Application Equipment
SCIP wall finishing requires a cementitious mortar designed for the system and project conditions. The mix must achieve the specified strength, workability, bond, and durability requirements. Standard decorative stucco is not automatically a substitute for a structural cementitious coating. The approved mix design, engineering requirements, and local code provisions control.
For larger projects, mechanized mixing and pumping equipment improves consistency and production. A continuous mixer or mortar pump can deliver a uniform material supply to the application crew, helping maintain water control and reducing the variation that often occurs with small-batch hand mixing. Structural Panels GCT supports the SCIP system with panel products as well as mortar mixing and application equipment because installation quality depends on both materials and process.
Water addition should be controlled carefully. Too much water can reduce strength, increase shrinkage, and contribute to cracking. Too little water can make the mortar difficult to place and consolidate into the mesh. Follow the mix manufacturer’s instructions and keep batch procedures consistent throughout the project.
How to Finish SCIP Walls With Cementitious Skins
Mortar is typically applied in successive passes to each side of the wall. The goal is not to bury the mesh under an arbitrary thick coat. The goal is to fully embed the wire reinforcement, achieve the specified total thickness, maintain a consistent plane, and create a sound base for the final finish.
Start on one face of the wall with an initial scratch or base application. Whether material is sprayed or hand applied, press it through and around the mesh so there are no voids behind the wires. The mesh should be fully encapsulated within the cementitious coating, with coverage and thickness verified against the approved details.
After the first pass has achieved sufficient set, apply additional mortar as needed to reach the required thickness and straighten the wall. Use screeds, straightedges, darbies, and trowels to establish a true plane. A rushed application may look acceptable from several feet away while leaving thin spots, hollow areas, or waviness that becomes obvious under paint, smooth coatings, or strong side lighting.
The opposite wall face should be finished according to the installation sequence specified for the project. In some cases, completing one side first supports stability and workflow. In other cases, crews may work both faces in coordinated stages. The correct sequence depends on wall height, bracing, equipment access, weather, panel configuration, and engineering requirements.
Treat joints, corners, and openings as high-detail zones
Flat wall areas move quickly. Corners and penetrations determine whether the finished building looks and performs like a professional installation.
At panel joints, ensure the mesh overlap and connecting wires are properly embedded. At outside corners, use the specified reinforcement and maintain straight, durable arrises. Around windows and doors, reinforce stress-prone corners as detailed and avoid discontinuities in the cementitious skin. Where the design calls for control joints, install them in the correct locations rather than using surface scoring as an afterthought.
Do not bridge incompatible materials without the required transition detail. A SCIP wall meeting a masonry base, steel member, framed infill, or another cladding system may require flashing, sealant joints, lath, or specialized accessories. These details manage movement and moisture while maintaining the intended exterior envelope.
Cure the Mortar Before Applying the Final Finish
Curing is not a cosmetic waiting period. It is part of strength development. Fresh cementitious mortar needs protection from rapid moisture loss, excessive heat, freezing temperatures, driving rain, and high winds. Poor curing can lead to reduced strength, dusting, shrinkage cracking, and weak bond at the final coating layer.
Use the curing method required by the mortar specification and local conditions. Depending on the product and climate, this may include light misting, wet curing procedures, curing compounds approved for subsequent coatings, temporary shading, wind protection, or a combination of methods. In hot, dry Caribbean or Southwest conditions, crews may need to adjust work hours and curing practices to prevent premature drying.
Do not apply paint, acrylic finish, waterproof coating, tile, or another architectural finish until the cementitious skin has cured adequately and meets the moisture and surface-preparation requirements of that finish. Finishing too early can trap moisture, weaken adhesion, or make cracking more visible.
Select the Architectural Finish for Exposure and Use
Once the structural mortar skin is cured and inspected, the final finish should match the building’s exposure, maintenance plan, and design intent. Exterior walls may receive a breathable coating system, textured cementitious finish, elastomeric coating where appropriate, masonry paint, stone veneer, or another approved cladding approach. Interior walls can be left with a troweled cementitious finish or prepared for paint, tile, or other interior materials.
The selection is not purely aesthetic. A coastal project may need a coating system suited to salt exposure and wind-driven rain. A high-traffic commercial interior may prioritize impact resistance and cleanability. In wildfire-prone regions, the complete exterior wall assembly, including coatings, roof intersections, vents, glazing, and trim details, should be evaluated for the applicable fire-performance requirements.
Breathability and drainage matter. A coating that blocks outward drying without a compatible moisture-management strategy can create problems in any wall system. Follow the coating manufacturer’s surface preparation requirements, including cleaning, primer selection, texture profile, and allowable moisture content.
Quality Control That Protects SCIP Performance
A practical inspection process should occur throughout the work, not just at final walk-through. Verify panel alignment and attachments before mortar. Confirm reinforcement at joints, corners, and openings before it is concealed. During application, check mortar consistency, mesh embedment, thickness, and surface plane. After curing, inspect for cracking, hollow-sounding areas, incomplete coverage, and defects at transitions.
Minor surface shrinkage cracking may occur in cementitious work and should be evaluated in context. Random cracking caused by inadequate thickness, poor curing, unsupported mesh, uncontrolled movement, or improper joint detailing requires corrective action. Do not cover unresolved defects with texture or paint and call the work complete.
For engineered SCIP projects, maintain installation records, material batch information, inspection notes, and photographs of concealed reinforcement conditions. This documentation supports quality assurance, helps resolve field questions, and gives owners and code officials confidence that the system was installed as designed.
A SCIP wall earns its reputation through the complete assembly: correctly installed panels, proper reinforcement, well-applied mortar, disciplined curing, and a finish suited to the building’s environment. When those steps are handled with the same care as framing or concrete placement, the result is a durable, insulated wall system positioned for the performance demands modern projects can no longer ignore.