
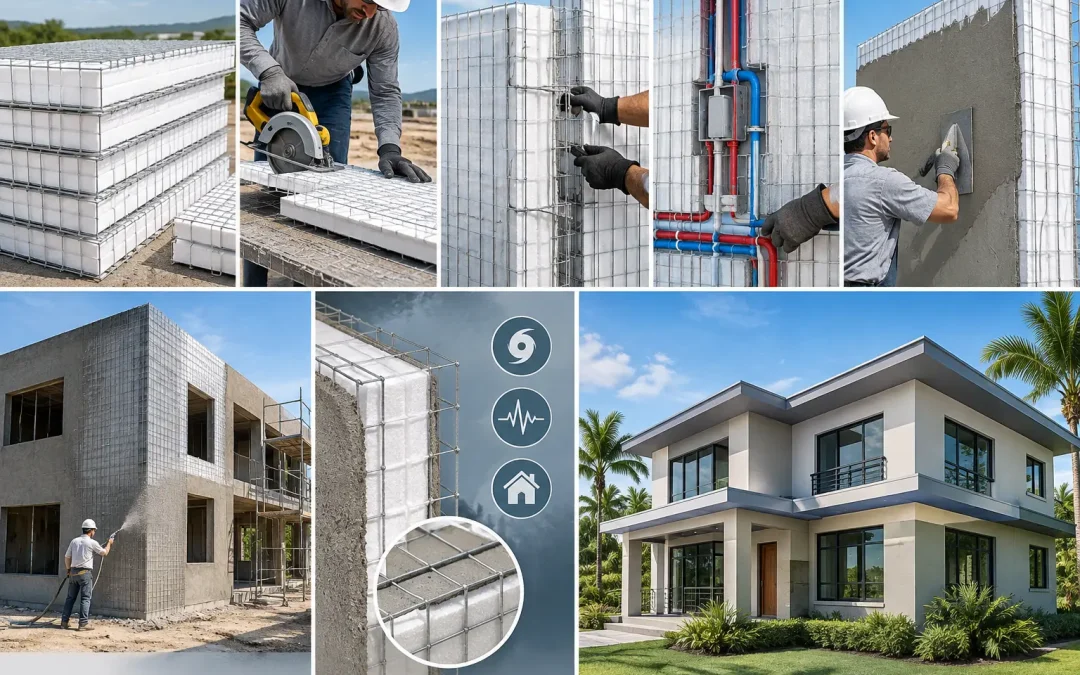
A SCIP panel is not finished like a conventional framed wall. The mortar coating is a structural component of the assembly, working with the galvanized steel wire mesh and EPS core to create a continuous, high-performance building envelope. Knowing how to apply structural mortar correctly affects more than appearance. It affects wall strength, durability, weather resistance, fire performance, and the project’s ability to meet the engineered design.
For contractors working in hurricane, wildfire, or seismic regions, that distinction matters. The rebuilding conversations following the Palisades fires in Los Angeles, as well as seismic events across the Caribbean and Venezuela, have made one point clear: material selection and field execution both determine how a building performs when conditions become extreme.
Structural Mortar Is Part of the SCIP System
Structural mortar is not finish stucco, masonry grout, or a generic bag mix selected at the jobsite. It is a specified cementitious coating designed to encapsulate and bond to the panel’s wire mesh. When applied to both sides at the required thickness, it creates reinforced concrete skins around the EPS core.
Those skins provide the assembly’s structural action. The EPS remains critical because it delivers continuous insulation, reduces thermal transfer, and keeps panel weight manageable during installation. But the mortar and steel mesh are what turn the installed panel into a durable wall, partition, roof, or floor assembly.
For that reason, the approved mortar mix, reinforcement details, coating thickness, and curing requirements must follow the project’s engineering documents and applicable evaluation reports. A properly installed SCIP system can support fast construction and lower operating costs while providing a far more resilient alternative to conventional wood framing in high-risk markets.
Prepare the Panels Before Mortar Application
Mortar application should begin only after the panels are fully aligned, secured, braced, and inspected. Trying to correct panel alignment after coating begins wastes material and can compromise the finished surface.
Confirm that panel joints are tied, openings are framed or reinforced as required, and any embedded utilities are located and secured. Electrical boxes, conduits, sleeves, and penetrations must be coordinated before the first mortar pass. The crew should also verify that additional mesh reinforcement is installed at corners, openings, connections, and other engineered stress points.
Before spraying or hand-applying mortar, inspect the mesh for debris, oil, loose wire, or damage caused during handling. The mesh must be exposed enough to receive mortar and remain properly tensioned. If the steel is bent away from the panel or reinforcement is incomplete around an opening, correct it before moving forward.
A pre-application check should cover at least these field conditions:
- Panels are plumb, straight, braced, and firmly connected to the supporting structure.
- Wire mesh overlaps, ties, and supplemental reinforcement match the approved details.
- Door and window openings have the required reinforcing treatment.
- Mechanical, electrical, and plumbing components are secured and coordinated.
- The substrate is clean and conditions are suitable for placement and curing.
This inspection is where experienced crews protect schedule and quality. Once mortar covers the mesh, problems become harder and more expensive to identify.
How to Apply Structural Mortar in Controlled Lifts
The most effective application method depends on project size, access, specified mix, and production goals. For larger SCIP projects, a mortar pump and spray equipment typically provide better consistency and faster coverage than hand application. For smaller areas, repairs, or difficult details, hand troweling may still be appropriate.
The goal is the same in either method: fully embed the wire mesh, build the coating to the engineered thickness, and maintain a continuous structural skin without voids, weak spots, or excessive sagging.
Mix for pumpability and specified strength
Use the mortar design specified for the system and project. Water should be measured and controlled rather than adjusted casually throughout the day. Too much water may make material easier to pump or trowel, but it can reduce strength, increase shrinkage, and create a weaker coating after cure.
The mix must be workable enough to penetrate the mesh and adhere to the panel face without slumping. On spray-applied work, crews should monitor pump pressure, hose condition, nozzle technique, and material flow. Inconsistent delivery can leave thin areas behind the mesh or create a finish that requires excessive rework.
Batch consistency matters. The first batch and the last batch should not behave like different products. A designated mixing lead and a clear water-control process prevent many avoidable placement problems.
Apply the initial structural coat
Start with an initial coat that forces mortar through and around the wire mesh. The applicator should work methodically across the panel face, paying close attention to joints, corners, panel connections, and reinforced areas around openings.
Do not treat the first pass as cosmetic coverage. Its job is to establish bond and embedment. If mesh remains visibly exposed after the coat has begun to set, or if the material bridges over wire without filling behind it, address that area immediately.
Work in manageable sections. Maintaining a wet edge helps prevent cold joints and visible transitions in the coating. On tall walls, sequencing should be planned so that scaffold access, pump hose movement, and finishing operations do not disturb freshly applied mortar.
Build thickness without overloading the wall face
The total mortar thickness is determined by the approved system design. It should never be guessed in the field or based on what “looks about right.” Use depth gauges, screeds, or other quality-control methods to verify thickness at regular intervals.
Depending on the required build and the material behavior, the coating may need to be placed in more than one lift. Trying to apply too much mortar at once can cause slumping, cracking, uneven thickness, and poor bond. Multiple controlled lifts often produce a flatter, stronger, more reliable surface.
Corners, returns, and narrow areas near openings deserve special attention. These locations are prone to thin coverage and damage during later trades. Confirm that reinforcing mesh remains properly embedded and that the required coating thickness is maintained around the full perimeter.
Finish only after structural coverage is achieved
After the mortar has been applied to the specified thickness and has reached the proper stage of set, crews can level and finish the surface for the intended wall assembly. The final texture may be float-finished, trowel-finished, or prepared to receive another approved finish system.
Appearance matters, especially on exposed walls, but it should not drive the structural work. Do not overwork the surface with water or repeated troweling. Excessive finishing can pull fines to the surface, weaken the skin, and increase the chance of shrinkage cracking.
Cure the Mortar for Long-Term Performance
A well-applied structural mortar coating can still underperform if curing is neglected. Fresh cementitious material needs protection from rapid moisture loss, extreme heat, direct sun, wind, freezing temperatures, and heavy rain during early curing.
The curing method and duration should follow the mortar manufacturer’s instructions and project specifications. In hot, dry, or windy climates, crews may need to begin curing measures quickly after finishing. In coastal and Caribbean environments, weather planning is equally important because sudden rain and high humidity can change placement conditions fast.
Protect fresh work from impact, vibration, and premature loading. Coordinate other trades so they do not cut, drill, or fasten into newly coated panels before the required curing period and approval process. Any penetrations added after coating must be detailed and repaired to preserve continuity of the assembly.
Quality Control That Protects the System
The best SCIP installations use simple, repeatable quality checks rather than relying on visual judgment alone. Verify mix proportions, record placement conditions, check thickness, inspect mesh embedment, and document curing procedures. Where required, obtain field samples or testing in accordance with the project specifications.
Pay particular attention to transitions: wall-to-foundation connections, roof interfaces, openings, panel joints, and penetrations. These are the points where water management, structural load paths, and air control meet. A panel field can look excellent while a poorly detailed transition creates future risk.
Structural Panels GCT supports a complete SCIP construction approach that pairs panels with the equipment, technical guidance, and application process needed to build efficiently. For contractors, that system approach reduces the uncertainty that comes from combining unrelated materials and methods on site.
Applying structural mortar is disciplined field work, not an afterthought. When the mesh is fully embedded, the specified thickness is maintained, and curing is handled with the same care as placement, SCIP panels become the high-strength, energy-efficient enclosure they were designed to be.