
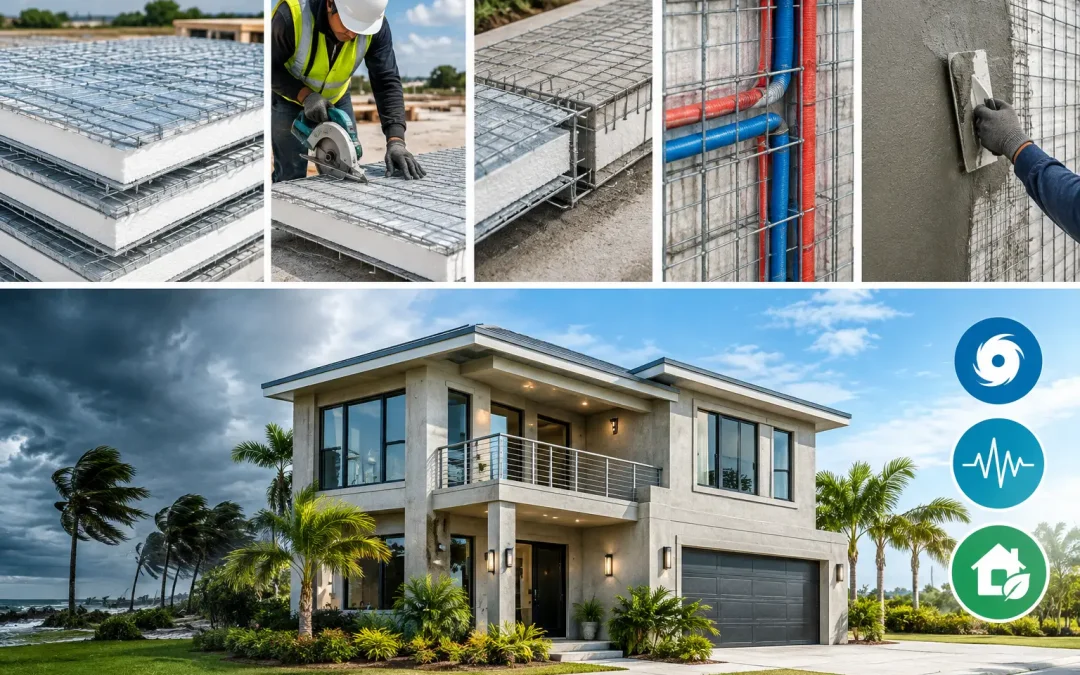
A roof is often the first building assembly to face wildfire embers, hurricane uplift, intense solar exposure, and wind-driven rain. SCIP roof installation gives project teams a different starting point than conventional wood framing: a continuous insulated panel assembly reinforced with galvanized steel wire mesh and finished with high-strength concrete mortar. When designed, installed, and detailed as a complete system, it supports a durable roof structure with meaningful thermal performance and fewer vulnerabilities associated with combustible framing.
For builders and owners rethinking material choices after the Palisades fires and other recent disasters, the roof cannot be treated as an afterthought. It must be coordinated with the walls, structural support, drainage plan, mechanical penetrations, and applicable code requirements from the beginning.
What a SCIP Roof Assembly Is Designed to Do
A Structural Concrete Insulated Panel consists of an expanded polystyrene, or EPS, insulating core sandwiched between galvanized steel wire mesh. Truss wires connect the two mesh faces through the core. Once concrete mortar is applied to both faces in accordance with the engineered design, the assembly becomes a composite structural element.
For roofing applications, SCIP panels are commonly used to create sloped or low-slope roof planes supported by designed beams, bearing walls, or a structural frame. The finished assembly combines insulation and structure in one field-built system. That matters in hot climates, high-wind regions, and projects where crews need to reduce the number of separate trades and materials required to close in the building.
The panel itself is not a substitute for project-specific engineering. Roof geometry, spans, imposed loads, uplift pressures, seismic demands, snow loads where applicable, support conditions, and finish materials all affect the final design. A well-executed SCIP roof begins with an engineered load path, not simply with panel placement.
Start SCIP Roof Installation With Engineering and Layout
Before panels arrive on the roof deck or support structure, the team should confirm the approved drawings, panel schedule, elevations, bearing points, openings, and roof drainage direction. This is the point where preventable field problems are avoided.
The roof pitch needs particular attention. SCIP can form roof slopes, but drainage should never rely on minor jobsite variation in mortar thickness. The structural geometry must establish positive drainage toward scuppers, drains, gutters, or other approved collection points. Low spots can compromise waterproofing and create unnecessary long-term maintenance exposure.
Support conditions also require precision. Panels must bear on the locations identified by the engineer, with proper connection details at perimeter beams, ridge conditions, and transitions to SCIP walls or other structural systems. Crews should verify line, level, and alignment before progressing across the roof plane. A small layout error at the first panel can become a major correction at the ridge or roof edge.
Openings should be framed and reinforced according to the design before mortar application begins. Skylights, roof hatches, vents, drains, ducts, and solar equipment supports introduce concentrated loads and waterproofing transitions. They cannot be handled as casual field cutouts after the roof is complete.
Panel Placement and Temporary Bracing
SCIP roof panels are lightweight compared with conventional concrete construction, which can improve handling efficiency. That does not remove the need for a disciplined installation plan. Panel lifting, placement sequence, worker access, and temporary bracing must reflect panel size, roof pitch, wind conditions, and site safety requirements.
Panels are set in the specified orientation and secured at supports with the approved ties, reinforcement, and connections. Adjacent panels are joined so the steel mesh and connecting wires maintain continuity across the assembly. Where field cuts are necessary, crews must restore required mesh overlap and reinforcement rather than leaving discontinuities that weaken the finished composite surface.
Temporary bracing is especially important until the roof reaches its designed composite condition. A panel assembly during placement is not the same as a completed, mortar-finished structural roof. Contractors should protect against movement caused by construction loads, weather, and worker traffic while maintaining safe access for mortar application and inspection.
Mortar Application Creates the Composite Structure
The mortar phase is where a SCIP roof becomes more than an insulated panel layout. High-strength concrete mortar is applied to both mesh faces at the thickness and strength specified by the engineering documents. Proper embedment of the wire mesh, uniform coverage, and controlled curing are essential to the assembly’s structural performance.
Application equipment can make a major difference in production quality. Mechanized mixing and spraying equipment helps contractors maintain a more consistent mortar mix and application rate than improvised methods, particularly on larger commercial, multifamily, and industrial projects. It also reduces labor-intensive hand application, although skilled finishing crews and quality control remain necessary.
Crews should avoid applying mortar in a way that creates excessive dead load, leaves voids around the mesh, or produces uneven surfaces that complicate the roofing finish. Thickness checks, mix control, curing procedures, and inspection of reinforcement at joints and openings should be part of the daily workflow.
Weather management matters. High heat, rain, and strong wind can affect application quality and curing. In hurricane-prone and tropical markets, scheduling must account for changing conditions, and exposed work should be protected according to the project plan. Speed is valuable, but a rushed mortar application can undermine the benefits the system is intended to deliver.
Waterproofing and Roof Finish Are Separate Critical Layers
Concrete mortar provides a durable structural skin, but it is not a complete waterproofing strategy by itself. Every SCIP roof installation requires a roof finish and flashing system appropriate for the roof slope, climate, exposure, and code requirements.
Depending on the design, this may include a compatible liquid-applied coating, modified bitumen membrane, single-ply roofing system, tile assembly, metal roofing, or another specified finish. The correct choice depends on slope, expected foot traffic, drainage configuration, UV exposure, maintenance expectations, and the warranty requirements of the selected roofing manufacturer.
Detailing at edges and penetrations deserves the same attention as the field of the roof. Parapets, eaves, ridges, scuppers, drains, vents, equipment curbs, and transitions to vertical walls are the locations most likely to develop leaks if flashing is poorly sequenced. The waterproofing contractor, SCIP installer, and design team should coordinate these details before the first panel is installed.
A useful rule for owners is simple: structural resilience and weatherproofing resilience must work together. A strong roof deck with weak flashing is still a risk. A high-quality membrane over an improperly engineered roof structure is also a risk.
Why SCIP Roofing Changes the Building Equation
Traditional wood-framed roofs can be efficient to construct, but they bring inherent exposure in fire-prone, hurricane-prone, and termite-prone environments. A completed SCIP roof assembly replaces combustible framing at the roof plane with a reinforced cementitious envelope around an insulated core. That is a practical advantage for projects prioritizing noncombustible structural materials and long-term durability.
The continuous EPS core also helps reduce heat transfer through the roof assembly. For owners in the United States and Caribbean, where roof solar gain can drive a large share of cooling demand, that insulation is more than a comfort feature. It can support lower HVAC loads when the whole building envelope is properly designed and sealed.
There are trade-offs. SCIP roofing requires trained installation crews, engineered details, material staging, mortar equipment, and close coordination with the selected waterproofing system. It is not a one-for-one swap for conventional trusses. However, for projects where resilience, energy performance, labor efficiency, and integrated construction matter, the system can reduce complexity by combining multiple functions into a single structural assembly.
Field Controls That Protect Performance
Quality control should be visible on the jobsite, not left to final inspection. The superintendent and installation team should verify panel placement, support bearing, reinforcement continuity, opening details, mortar thickness, curing, and drainage geometry as the work progresses. Photo documentation before mortar covers connections and reinforcements provides a useful project record.
The final roof should also be evaluated as a system. Confirm that penetrations are sealed, drainage points are clear, flashings are complete, and the specified roof finish has been installed under the manufacturer’s requirements. If solar arrays, mechanical units, or future equipment are planned, their attachment strategy should be designed into the assembly rather than drilled in later without review.
Structural Panels GCT supports SCIP projects as a complete building system, including panels, mortar mixing and application equipment, and technical guidance for teams building with a performance-driven alternative to wood framing. The best time to make a SCIP roof perform is before installation begins: coordinate the engineering, train the crew, protect the details, and build the roof as the resilient envelope it is designed to be.