
A SCIP inspection guide is not a substitute for approved plans, an engineer of record, or the authority having jurisdiction. It is the field-control process that confirms the installed panel system matches the structural design before concrete mortar makes critical work difficult to see, measure, or correct. For builders replacing wood framing in fire, hurricane, or seismic zones, that timing matters.
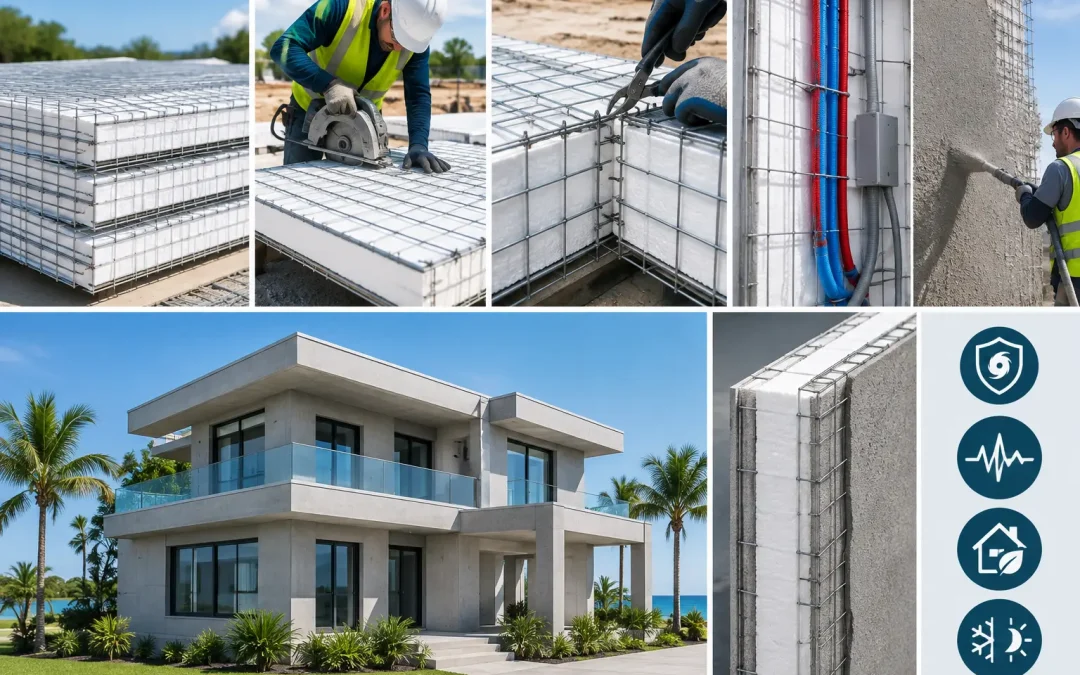
Structural Concrete Insulated Panels combine galvanized steel wire mesh, an expanded polystyrene (EPS) insulating core, connectors, reinforcement, and high-strength cementitious mortar. The completed assembly performs as one structural envelope. That performance depends on disciplined installation: correct panel alignment, positive connections, properly detailed openings, specified reinforcement, and consistent mortar application.
Start the SCIP Inspection Before Panels Arrive
The most efficient inspection happens before the first panel is stood. Review the current approved drawings, structural details, panel layout, engineering calculations where applicable, and project specifications. The superintendent, installer, engineer, and inspector should be working from the same revision set. A field crew cannot build accurately from an outdated architectural plan when the structural details have changed.
Confirm that delivered panels match the intended application. Wall, partition, floor, and roof panels may have different thicknesses, mesh configurations, and reinforcement requirements. Verify panel identification, quantities, dimensions, and condition at delivery. EPS cores should be intact, galvanized mesh should not be significantly bent or damaged, and accessories should be present before installation begins.
Site conditions deserve the same attention. The slab, foundation, or supporting structure must be within the tolerances required by the approved design. A panel system can only be plumb if the bearing surface is level and correctly located. Check anchor locations, embedded plates, starter bars, and perimeter dimensions before crews begin cutting panels to compensate for an avoidable layout problem.
Verify the Approved Load Path
Every inspection should begin with a simple question: how do gravity, wind, seismic, and uplift forces travel through this assembly to the foundation? The answer must be visible in the details, not assumed in the field.
Inspect the base connection, panel-to-panel connections, corners, intersections, roof or floor diaphragm connections, and top-of-wall details against the engineered documents. In hurricane-prone locations, uplift continuity is especially important. In seismic regions, connection detailing and reinforcement placement require equal attention. The panel itself is only one part of the structural system.
SCIP Inspection Guide: What to Check During Installation
Panel placement should be inspected early, while adjustment remains practical. Check wall lines, panel orientation, plumbness, level at bearing points, and alignment at corners and openings. Small errors at the first course can multiply across a long wall or multi-story structure.
Panels should bear where the design requires bearing. Do not accept unsupported gaps, improvised shims, or field alterations that are not addressed by the engineer of record. When a panel is trimmed, verify that the mesh, core, and any required supplemental reinforcement are restored according to the approved detail.
Mesh, Ties, and Panel Connections
The galvanized wire mesh is a working part of the finished composite assembly. Inspect both faces for continuity and damage. At panel joints, confirm that mesh overlap, lacing wire, clips, or specified connection components are installed at the required spacing. Loose or incomplete ties can allow movement during mortar application and can compromise the intended composite action.
Pay close attention to corners, T-intersections, wall-to-roof transitions, and wall-to-floor connections. These locations concentrate load transfer and are where rushed installation is most likely to create hidden deficiencies. Supplemental mesh, angle reinforcement, connector wire, or mechanical fasteners must match the approved detail.
Field crews should not flatten mesh excessively to solve an alignment issue. The mesh needs proper positioning so the specified mortar cover can be achieved on both faces. If it is deformed, cut, or displaced, stop and document the condition before it is covered.
Openings, Headers, and Service Penetrations
Doors, windows, louvers, and large mechanical openings require more than clean cuts through EPS. Inspect dimensions and location before reinforcement is installed, then verify the specified header, jamb, sill, diagonal reinforcement, and mesh treatment. Openings are common stress concentrations, and missing reinforcement can lead to cracking or reduced capacity.
Coordinate electrical and plumbing penetrations before mortar work. SCIP systems can accommodate services, but uncontrolled field chasing can reduce insulation thickness, disturb mesh, or conflict with structural reinforcement. Large penetrations, sleeves, and embedded items should be reviewed against the approved plans and coordinated with the responsible design professional when required.
Reinforcement and Embedded Components
Where the engineered design calls for vertical bars, horizontal reinforcement, boundary elements, straps, hold-downs, or embedded plates, inspect them before mortar covers the work. Verify bar size, spacing, lap length, development, location, and tie condition against the drawings. Also check that reinforcement is clean and positioned to receive the required cover.
Do not rely on a verbal confirmation that steel is in place. Photograph critical reinforcement at corners, around openings, at high-load walls, and at roof connections. These records can support inspection sign-off, owner documentation, and later coordination if modifications are proposed.
Inspect Mortar Application as Structural Work
Concrete mortar is not merely a finish coat. It forms the structural skins that work with the steel mesh and EPS core. Mortar application should be treated with the same discipline applied to concrete placement in any other structural assembly.
Before spraying or applying mortar, confirm that the substrate is clean, mesh is secure, reinforcement is complete, and openings are protected. Use the specified mortar mix, water ratio, and application equipment. A complete system provider can support the work with mortar mixing and application equipment designed for consistent production, but equipment does not replace quality control.
Inspect thickness frequently using the project’s approved method. Thickness must meet the design requirement across wall faces, corners, joints, and around openings. Thin areas may reduce required cover and structural performance; excessively thick application can add unnecessary weight, increase material use, and create uneven curing conditions.
Application should achieve full embedment of the mesh without voids, exposed wire, or poorly consolidated areas. Check transitions between passes and inspect the reverse side of panels where access permits. A smooth surface is not proof of adequate thickness or mesh embedment.
Curing and weather protection matter. Hot, dry, windy conditions can accelerate moisture loss, while rain can damage fresh mortar. Follow the specified curing procedure and protect the work accordingly. If temperatures, wind, or moisture conditions fall outside the product requirements, pause work or implement approved controls rather than accepting an uncertain finish.
Document Hold Points Before Work Is Concealed
A reliable SCIP inspection program uses hold points: moments when work stops until designated items are reviewed. The exact sequence depends on jurisdiction and project scope, but common hold points occur after layout and anchorage, after panel and connector installation, after reinforcement and opening details, and before or during mortar application.
Keep inspection records practical and traceable. At minimum, retain the approved drawing revision, daily installation areas, photos of concealed conditions, material delivery records, mortar batch information when required, inspection reports, and corrective-action documentation. For commercial, institutional, and multi-unit work, these records can be as valuable as the final finish because they demonstrate that critical details were verified before concealment.
When a discrepancy is found, identify it early, mark the location, notify the responsible party, and obtain direction before proceeding. Do not bury a questionable connection under mortar because the schedule is tight. Rework before coating is faster, less expensive, and more defensible than corrective work after finishes are installed.
Build for the Hazard Zone You Actually Serve
The Palisades fires pushed many owners and developers to reassess the exposure created by conventional wood-frame construction. Seismic events in Venezuela and repeated Caribbean hurricane losses reinforce a related point: material selection alone does not create resilience. Resilience comes from a tested system installed to its approved details and verified in the field.
SCIP construction offers a practical path to durable, insulated assemblies with reduced dependence on traditional framing labor. Yet the benefits only carry through to the finished building when inspectors and installers protect the load path, reinforcement, mortar thickness, and documentation at every stage. Treat each inspection as part of the building system, and the project is better positioned to deliver the fire resistance, hurricane resistance, earthquake resistance, and energy performance the owner is counting on.